Well it has been awhile and I’ve been busy overhauling and running proper electric, water, and internet cable. We have been running on extension cords and garden hoses previously. This was unsafe, so something had to be done.
So the project began with me marking off the area with stakes and a string path for the trench from one side of the property to the other where the electric and water would be ran.

Water and Electric Trench plan
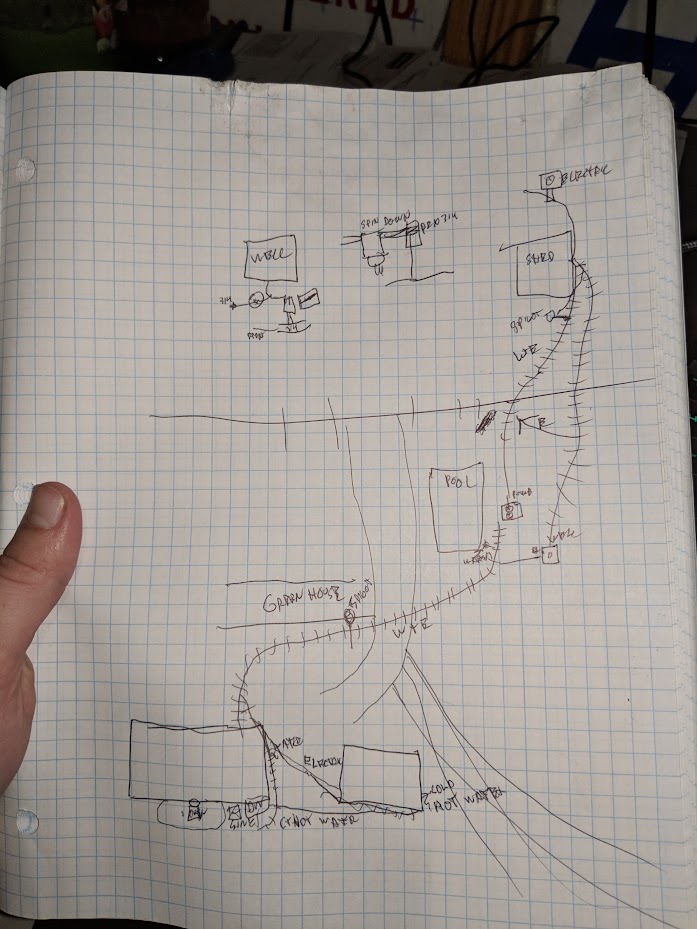
Over the next few weeks I went out almost daily and dug a little each day by hand to get it down to 2ft deep, from that power pole to the tiny house and bathroom soon to be office. This was a lot of work even with proper trenching shovel. Once the trench was complete we were able to run the cat6 Ethernet cable, the electric wire and water pipes in the trench to rough it in.
Electrical:
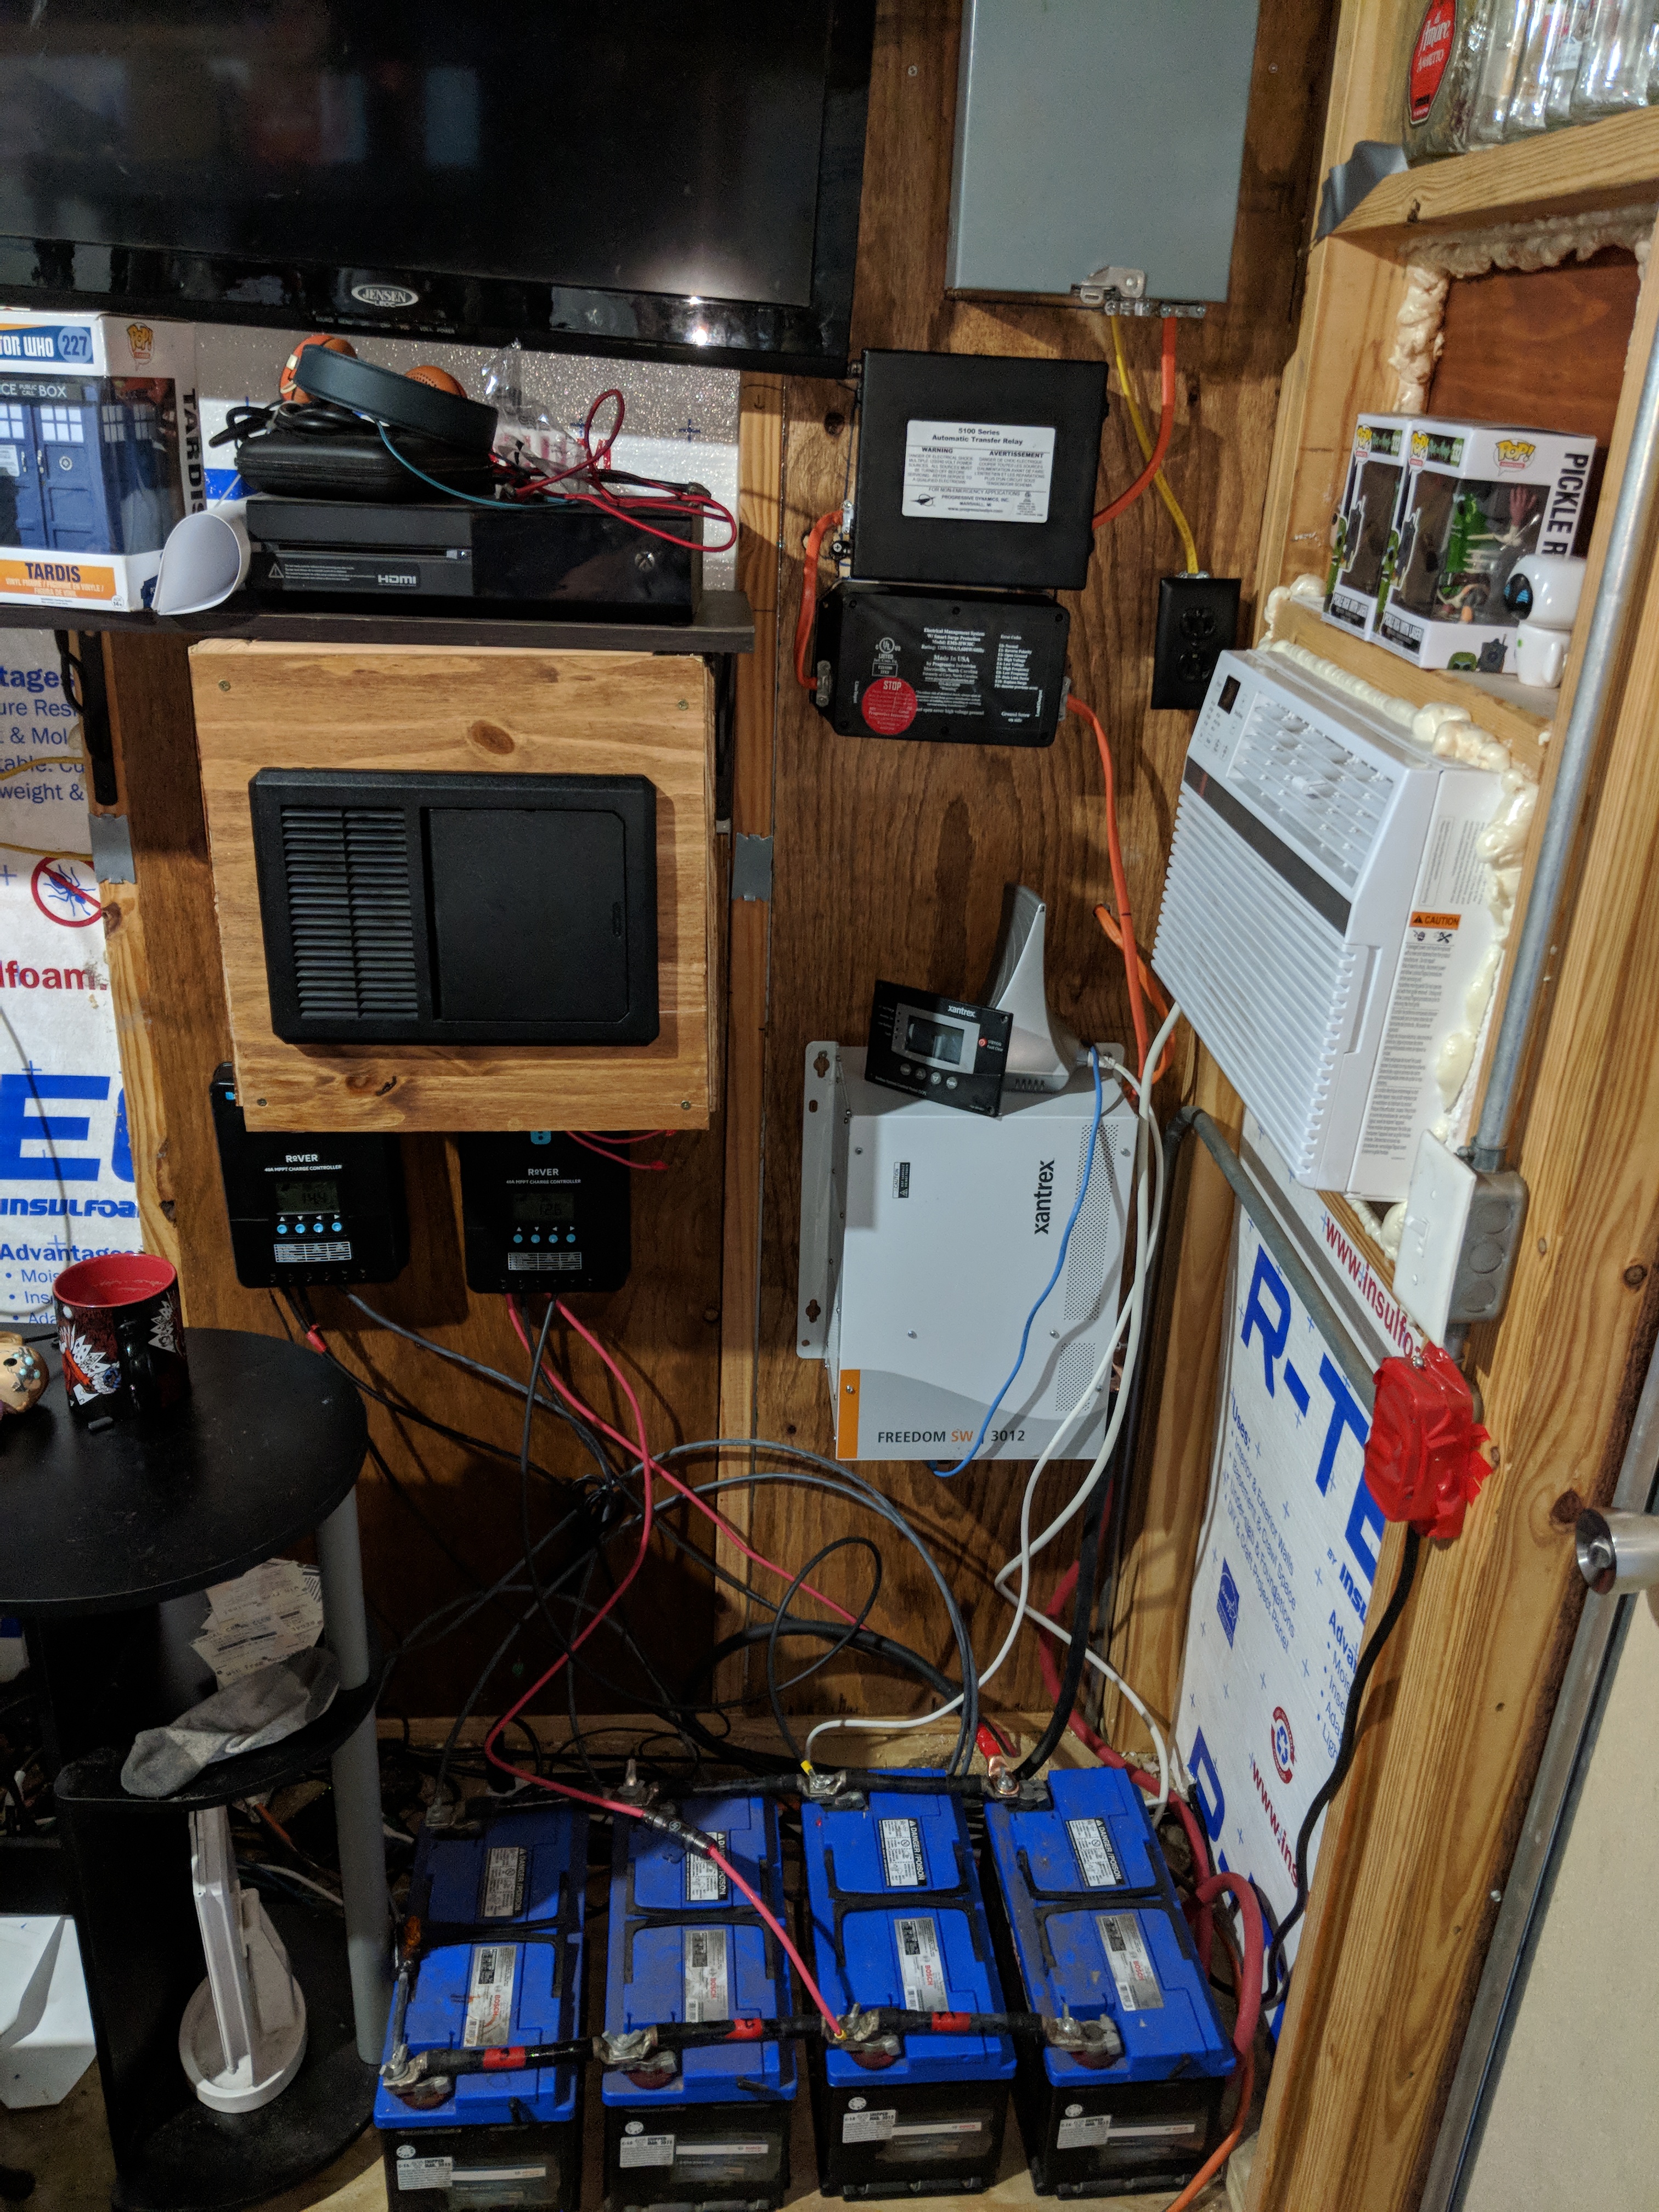
We had an existing 10/3 UF cable ran to near the pool which we switched from being a 20amp dual outlet into a 220v 30amp circuit by swapping out that breaker and an empty one next to it for 220v 30amp dual pole breaker. It’s the double breaker on the top right in the picture below.

We tapped into this line inside the outdoor water proof receptacle, by disconnecting it from the dual outlets and connecting them together.
We ran this to the sub-panel in the back of property for the tiny house and connected it there. We also then ran another 10/3 UF from the tiny house to the other outbuilding which is currently a bathroom for power there.
From the sub-panel in the tiny house the Electric feeds into a 30amp 120 breaker which feeds into auto transfer switch which feeds into a 30amp surge protector(RV grade) which then feeds into the inverter/charger AC input. This is confusing to word but basically the tiny house runs completely off-grid when needed, automatically. When the grid is online it charges the battery bank as well via solar power during the day. If desired I can also tie in the existing generator into the auto transfer, and switch the second slot which is right before the surge protector.
See the below wiring diagram for a more visual approach it seems complex but works very well with grid/solar/generator as input and from battery when no power source is available.
 We have 800 watts of solar charging the small battery bank which is enough power to run the fridge, lights, fan and tv/xbox for a decent amount of time. We have a dedicated circuit for the A/C unit which is grid only so the A/C unit cannot run accidentally from the batteries and drain them if were not home or awake. If the grid is down we will not have A/C without the generator for the time being until the battery bank and solar array is upgraded. Pardon the mess we are still in middle of organization and being crammed in a small space.
So everything works electrical wise and works multiple ways and is well documented so if i need to modify or upgrade we can. Did I mention we put in outlets which have built in USB chargers? These are amazing for tiny houses and RV so you do not need the brick charger plugged in. You just plug in the USB cable directly into the wall like you would to a computer and it charges any device that uses a USB cable. Pretty sweet and space saver and leaves the 2 outlets per box available for other stuff. Highly recommend these for near beds or place you would typically use or charge devices.
Most of the stuff in this build was salvaged from our RV which was totaled when it threw a rod through the engine while we were evacuating from the Hurricane Irma last year. So we pulled anything of value out of it and reused it in the tiny house.
Internet/Ethernet cable:
So we have DSL and it works, it is a bit slow and we originally had it setup near the front of property where the RV was parked. So when we moved to the tiny house in back opposite corner we had to get a 300 ft cat6 direct burial rated cable to get proper internet to the back without errors. This we fed into the same trench as the Electric. Nothing fancy but beats spotty WiFi from across the lot. We do have WiFi in the back and in front which kind of overlap now and works nicely.
Water:
For the water we dug another intersecting trench from the well into the first trench and then ran a 1″ Pex pipe the other direction towards where we will be building the official house eventually. I did not want to have to dig this up to splice main house into the well later on so we grabbed a 100′ 1″ pex pipe for cheap and ran that in the same trench going that direction and left it hanging out at an angle so it can veer off from there to where the house ends up without having to dig and risk damaging a wire or pipe in the future.
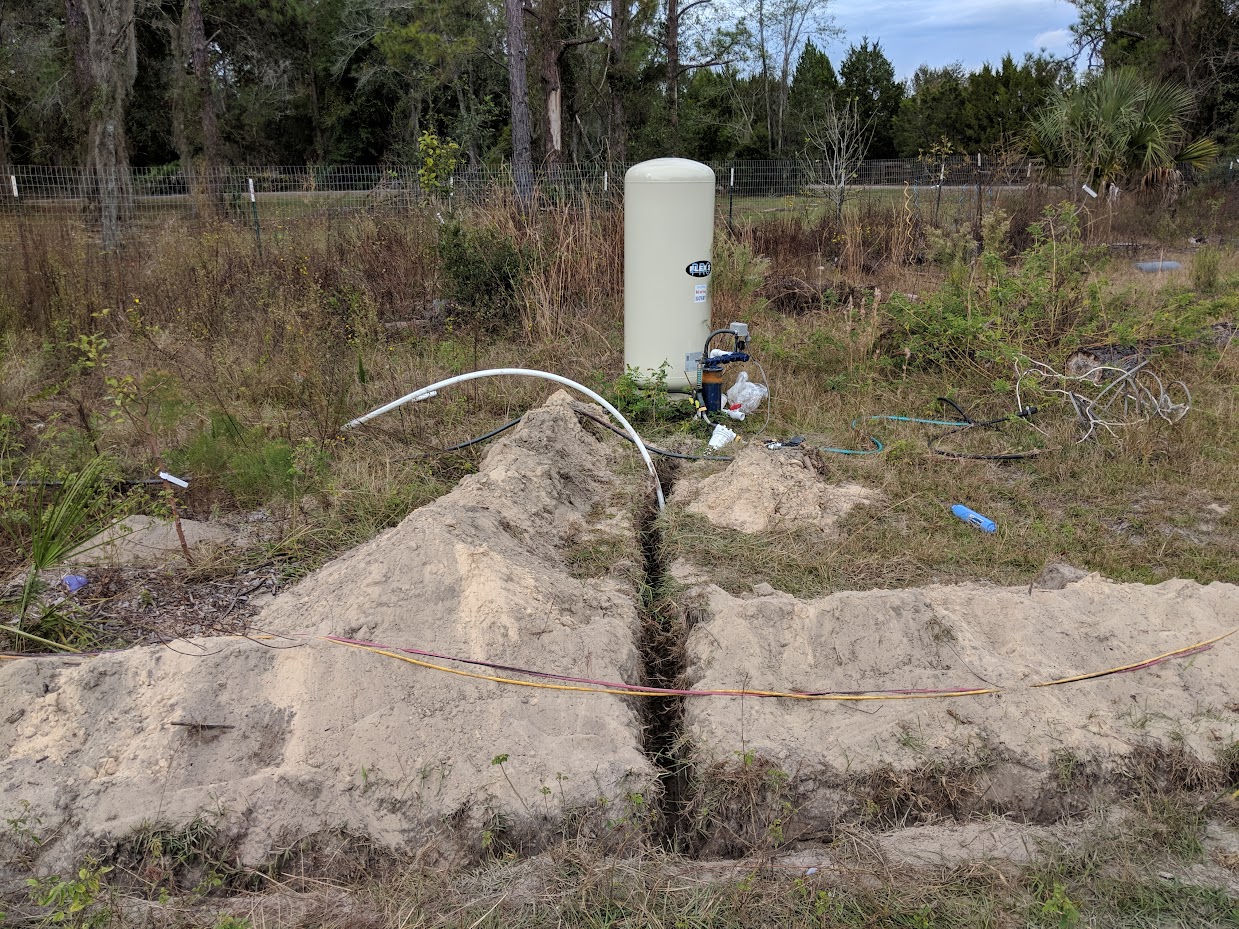
We then ran a 3/4″ Pex pipe all the way from the from the front to the back and then from the well to T into that. This provides water to laundry shed in front and tiny house and irrigation in back and future proofs the setup for the eventual house build too.
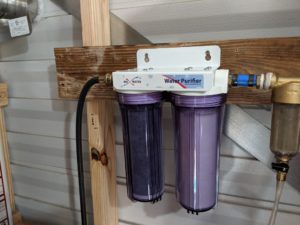
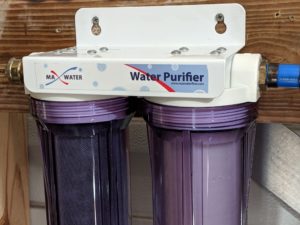
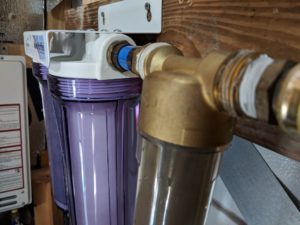
We have well water so it has a bit of sediment and sand since its still only a year old. To remedy this we have setup a 50 micron spin down filter > 1 Micron sediment filter > .5 Micron Activated Charcoal filter. This allows us to save money on filters as the spin down filter catches the big stuff and can be cleared without needing to swap a filter and is reusable and hand washable if it does get too dirty to spin flush.
The filter housing we reused from previous projects so they do look tacky but they work. Eventually will get the double filter housing where their same size and one mount holds them both. Recommend this if you’re doing a new build for simplicity piping wise.
Water is pretty clean from here for all our needs in sinks showers etc. We then filter the drinking water from this through a Berkey filter which cleans up anything these filters may have missed. The Berkey filter is a gravity fed system so works from any water source such as our rainwater collection system or well. Eventually i want to make an automated Berkey system which is still gravity fed but when there is grid power and well water it will auto fill with a float valve and batch filter water into a dedicated drinking water cistern and dedicated drinking water line in the house and kitchen so we do not have to fill it daily for drinking and cooking purposes.
Now that everything was connected and working I started on filling in the trench as cold was predicted and it reached 33 and 37 degrees Fahrenheit, a couple of times during this period which is really cold here for Central FL. Which is why we ended up deciding to bury water pipes in addition to the proper electric so we would still have working water.
We used Pex as its pretty much freeze proof easy to work with is mechanical an less joints then using PVC which would require joints and straight trenches and or lots of elbows. Pex is amazing and if your working with any kind of plumbing would recommend using it there is ways to splice into any kind of plumbing and use pex from there for new stuff or repairs and save you a lot of money once you have Pex tool which is like 45-60$. Recommend going for ratcheting Cinch type pex tool vs crimp ring type. This tool is universal for all pex sizes and easier to use.
Shortly after the trench was mostly filled we started getting more cold and rain which would have been frustrating to fill in settled wet dirt.
Some pictures of various stages of the Tiny house project are below.
Tiny House photos
Components:
Electric Main components:
Renogy 400 Watt 12 Volt Monocrystalline Solar Starter Kit with 40A Rover MPPT Charge Controller
Schneider Electric 815-3012 Freedom SW Series 3000 Watt Inverter/Charger
Progressive Dynamics (PD5110010V) 30 Amp Automatic Transfer Relay System
PROGRESSIVE INDUSTRIES EMSHW30C Surge Protector
Progressive Dynamics PD4060KV Inteli-Power 4000 Series Converter with Charge Wizard – 60 Amp
Southwire 250-ft 10/3 UF Wire (By-the-Roll)
Internet/Phone
SureCall Flare 3G/4G Signal Booster
Pepwave MAX BR1 Mini with North America 3G/4G/LTE Modem
Plumbing Components:
Midwest Control MBB-100NL 600 CWP 1″ MPT X FPT Lead Free Brass Ball Valve
3/8 in. to 1 in. 1-Hand PEX Pinch Clamp Tool
BestPEX 51175 Metal Brass Plug, 1″ Size
SharkBite 1-in x 100-ft PEX Pipe
SharkBite 25406A Silicone Wrap for Underground Burial of SharkBite Fittings
SharkBite Brass 3/4-in PEX Barb Ball Valve
3/4 in. Brass Push-to-Connect x MHT Garden Valve with Drop Ear
2 Stage10″ Whole House Water Filter Sediment Carbon Filter /RVS/Well/Pool/Boiler
Wow what a lot of work thank you for organizing it so others can learn from you I really like the list of all the parts at the end that must have taken you hours to tape type love you and proud of you Mom